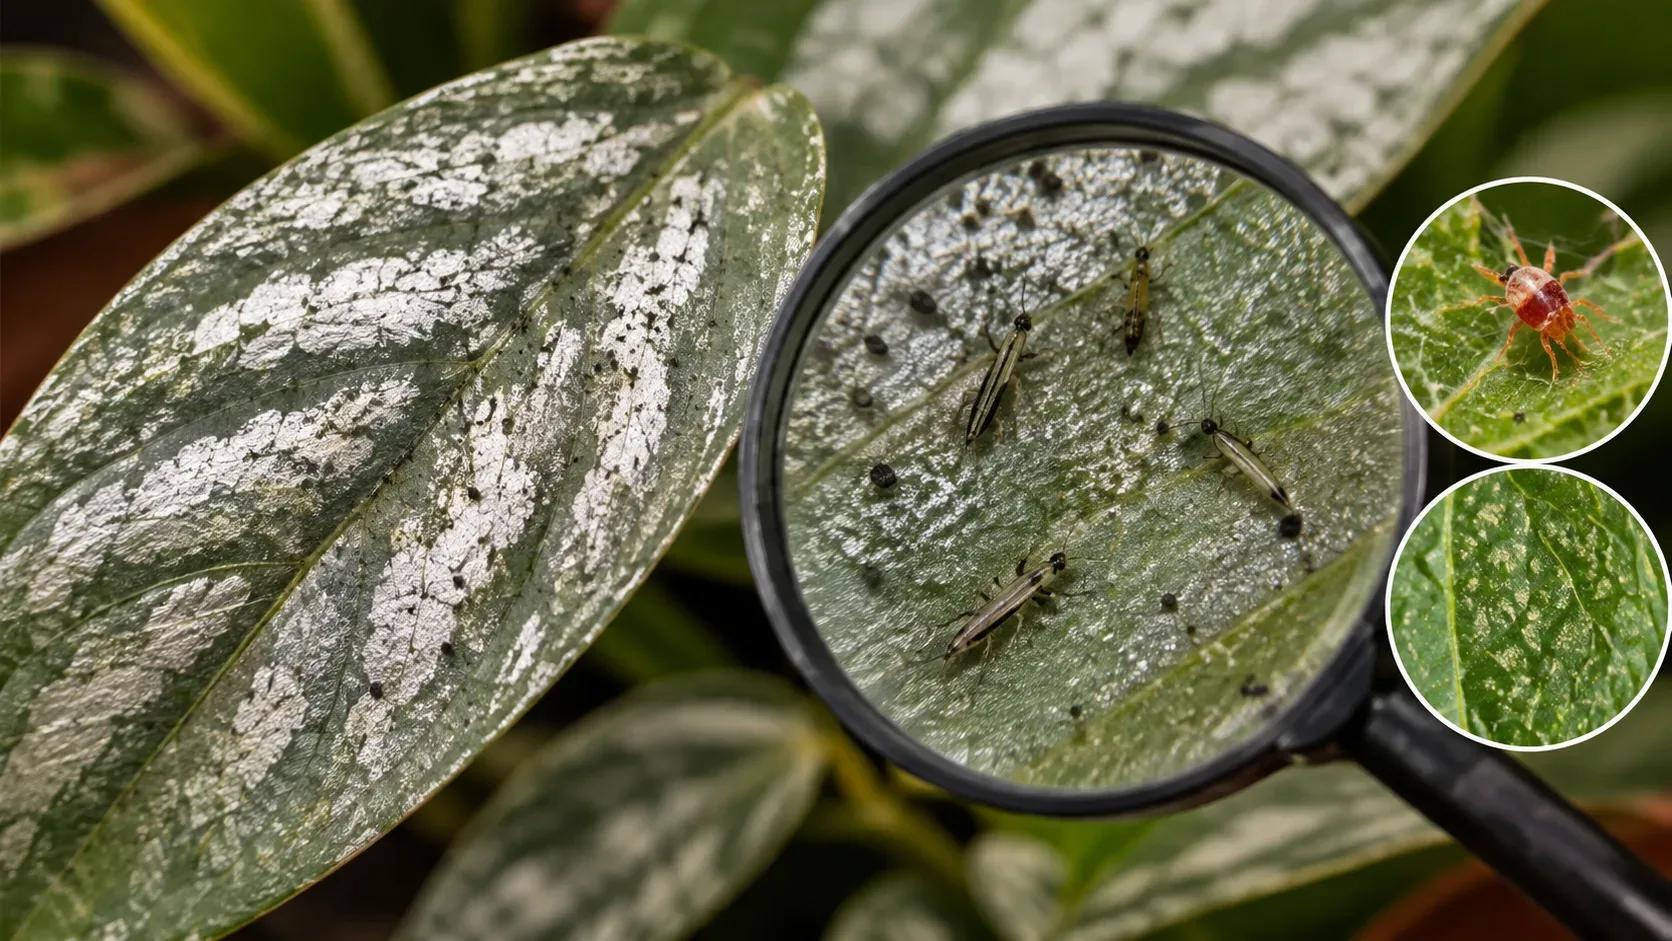
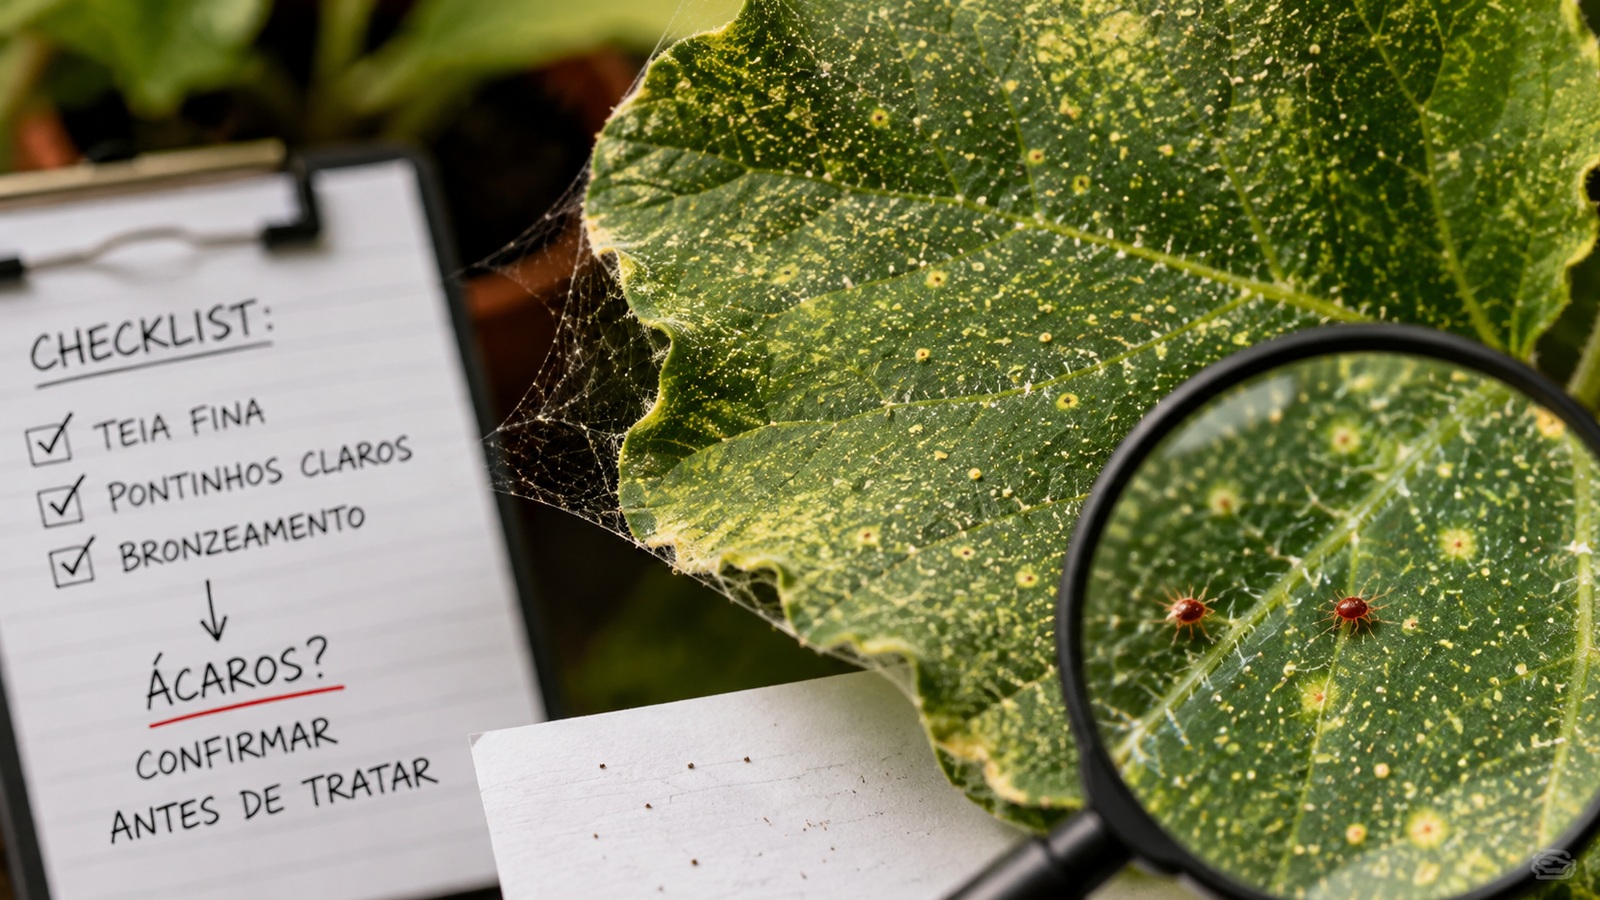
Fine webbing over a leaf, many pale specks, and areas that are starting to turn yellow or bronze form a pattern that is highly consistent with spider mites, especially silk-producing species such as the two-spotted spider mite. Even so, these signs should not be treated as automatic confirmation. The safest step before applying any product is to locate the organism or its traces directly on the plant.
The logic is simple: stippling and bronzing show damage, while finding mites, eggs, and webbing on the underside of the same leaf brings the diagnosis closer to the actual cause. This check also reduces the risk of confusing spider mites with thrips, water stress, a web made by a spider, or even other mite groups that cause different symptoms.
What fine webbing, stippling, and bronzing mean together
Spider mites feed by piercing leaf cells and removing their contents. The first visible damage often appears as tiny whitish or yellowish spots, an effect known as stippling. As the infestation advances, the spots can merge and the leaf may lose its green color, turn yellow or whitish, or take on a bronze tone.
Webbing adds an important clue. Species in the family Tetranychidae, including the two-spotted spider mite, form colonies mainly on leaf undersides and can produce silk threads over the infested surface. In larger populations, this webbing can become obvious along edges, veins, petioles, and between nearby leaves.
Even so, the order of diagnosis matters. Stippling without webbing does not prove that mites are the problem. Webbing without damage is not enough either. The sign becomes much stronger when damage, webbing, and organisms appear together in the same area of the plant.
Start with the underside of the most affected leaf
Choose leaves with recent stippling that are not yet completely dry. Turn the leaf over and first inspect the veins, the base of the blade, and areas protected by fine threads. Spider mites are tiny and may look like nothing more than moving dots to the naked eye; a hand lens with about ten-times magnification makes the inspection much more useful.
Look for small oval bodies moving slowly, as well as round, pale eggs attached to the surface or close to silk threads. Adult two-spotted spider mites are usually around half a millimeter long and can range from greenish and yellowish shades to orange or reddish tones. For that reason, color alone is a weak criterion: a red dot does not confirm the pest, and a mite that is not red does not rule it out.
What matters is the convergence of signs. If the organisms are located precisely on the undersides of stippled leaves, accompanied by silk threads and progressive damage, the practical diagnosis becomes much more consistent.
Do the white-paper test
When the hand lens does not settle the question immediately, the white-paper test is one of the simplest ways to make mites visible. Hold a sheet of paper or a white card directly below the suspect leaf. Tap the leaf gently or shake it over the paper and observe what falls.
Dust and plant fragments stay still. Mites appear as very small dots that begin moving across the white background. If you see movement, use the hand lens to examine the body shape more closely. This test is especially useful when mites are present but difficult to see directly on the leaf.
The test, however, should not be interpreted on its own. A moving dot on the paper confirms the presence of a tiny arthropod, not necessarily the exact identity of the pest. Predatory mites and
small beneficial insects also exist. Therefore, compare what falls on the paper with the location of the damage, the webbing, and the appearance of the leaf underside.
How to tell spider-mite webbing from a spider web
True spiders can also build webs in pots, on branches, and between leaves, but they are predators of other arthropods and do not cause the pale stippling typical of spider-mite feeding. A spider web may simply be using the plant as support.
When spider mites are suspected, look for very fine silk attached to the leaf surface itself and crossing small infested areas. Then confirm whether moving dots, eggs, and leaf damage occur in the same place. If there is webbing but the leaf remains normal and no colony appears on the underside or in the white-paper test, there is still not enough evidence to attribute the problem to spider mites.
What if they are thrips?
Thrips can also leave leaves with stippling, pale patches, or a silvery appearance. The practical difference is that they are elongated insects that look like tiny dashes, and the damage is often accompanied by tiny dark fecal spots. They do not produce the characteristic silky webbing of spider mites.
The white paper can also knock thrips off the leaf, so the organism's shape helps. Under a hand lens, a thrips tends to look narrow and elongated; a spider mite has a rounder or more oval body. If silvery areas, small black dots, and elongated insects predominate, the thrips hypothesis becomes stronger.
Not every mite produces webbing
The word mite covers different groups. Broad mites and cyclamen mites, for example, are even smaller than spider mites and can cause curled, thickened, brittle, stunted, or bronzed new growth. In those cases, typical webbing may be absent and identification may require greater magnification or specialist evaluation.
This creates a useful distinction for home diagnosis. The combination of fine webbing, pale stippling, and bronzing points mainly to silk-producing spider mites. Very deformed or thickened new leaves, without the same webbing and without organisms visible through a common hand lens, call for caution before concluding that the problem is the same.
When confirmation is strong enough
For a practical management decision, confirmation becomes strong when three pieces of evidence coincide: the damage appears as stippling or bronzing, fine webbing is present in the affected area, and inspection of the underside or the white-paper test reveals mites consistent with the colony. Round eggs near the silk threads strengthen the assessment even further.
If you have only one of these pieces of evidence, repeat the inspection on other leaves of the same plant and on nearby plants. Old damage can remain after the population has declined, and leaf symptoms can have more than one cause. Treating based only on appearance increases the chance of using an unnecessary or unsuitable product.
What to do before applying any product
After confirming spider mites, the choice of control depends on the plant species, the growing location, and which product is legally labeled for that use. On plants that tolerate the practice, streams of water directed at leaf undersides can remove part of the population. Horticultural oils and insecticidal soaps also appear in spider-mite management recommendations, always following the label, plant compatibility, and application conditions.
Avoid the logic of applying a broad-spectrum insecticide just as a precaution. Besides not necessarily solving the problem, this type of treatment can affect the mites' natural enemies and favor later outbreaks. Monitoring before treating is part of control, not a bureaucratic step.
If identification remains uncertain, preserve a symptomatic leaf and, if possible, a sample of the organisms collected on the white paper. A magnified photo of the underside can help, but it does not replace observation when the organism is too small for the camera. For valuable plants, large collections, or cases in which damage is advancing quickly, an assessment by a technical assistance service or laboratory can help avoid a wrong diagnosis.
The practical rule for avoiding blind treatment
Fine webbing plus pale stippling plus bronzing is a combination that deserves immediate suspicion of spider mites, but the decisive sign is finding the colony or its traces on the underside of the leaf. Use a hand lens and white paper to turn a visual suspicion into a concrete check.
If moving mites, eggs, and silk are present on the same leaf that shows the damage, you have a much better basis for choosing management. If those elements do not appear, keep investigating before applying a product. The difference between observing first and treating on impulse may be exactly what prevents wasted time, loss of beneficial organisms, or treatment of the wrong cause.